Showing posts with label protection. Show all posts

Monday, 24 October 2016

REMOVE BLACKBERRY 10 ANTI THEFT PROTECTION BY GSMZA

REMOVE BLACKBERRY 10 ANTI THEFT PROTECTION BY GSMZA


REMOVE BLACKBERRY 10 ANTI THEFT PROTECTION

In this guide, I’ll be explaining how to bypass or remove the Anti-theft protection on your Blackberry 10 device in case you never set such or you forgot your login credentials. The Anti-theft protection is a security feature which is meant to help you track, block or wipe your Blackberry 10 device if it gets lost or stolen

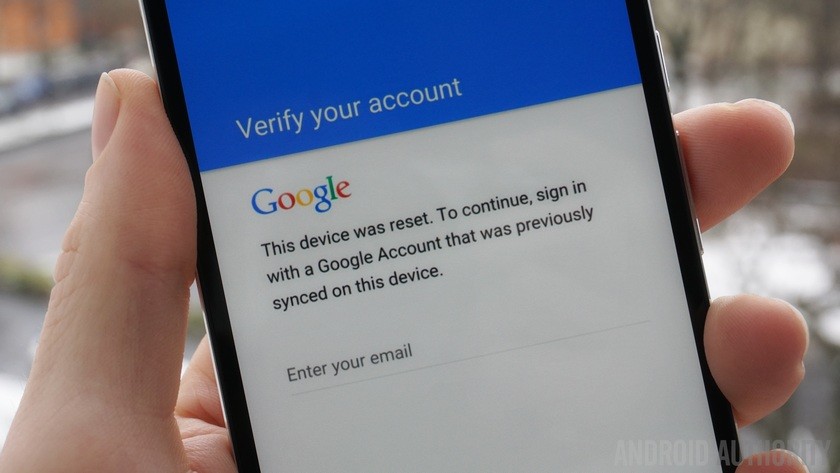
With BlackBerry 10 OS version 10.3.2, your privacy and security are further enhanced with the introduction of Anti-Theft Protection within BlackBerry Protect.

Provided you have confirmed your BlackBerry ID, Anti-Theft Protection associates your BlackBerry ID with your device, and provides you with the ability to disable your device using a new Flag as Stolen option.

When used, Flag as Stolen will erase your device memory and disable your device, unless the BlackBerry ID which was used to setup the device originally with Anti-Theft Protection, is entered on the device.

In other words, unless your device is returned to you, no one else will be able to setup the device again since they do not know your BlackBerry ID credentials.

It was said you cant downgrade to 10.3.1 but i was able to discover Q10 10.3.1 that support  all bb10 model with 10.3.2.2639 to downgrade.

DOWNLOADS LINK

Passport Anti theft removal SQW100-1/2/3               10.3.1 Download

Q5 Anti theft removal SQR100-1/2/3                         10.3.1 Download

Q10 1Anti theft removal SQN100-1/2/3/4/5/6/7        10.3.1   Download

Z10 Anti theft removal  STL100-1                             10.3.1 Download

Z10 Anti Theft Removal STL100-2/3/4                     10.3.1 Download

Z30 Anti theft removal  STA100-1/2/3/4/5/6            10.3.1   Download

Z3 Anti theft remova STJ100-1/2                              10.3.1 Download


MORE LOADERS-    Download Here

Watch TUTORIAL


followme

Available link for download

Read more »

Remove write protection from your flash drive memory card

Remove write protection from your flash drive memory card


Some memory cards and USB pen drives have write protection switches, which allows you to prevent files from being deleted, or any new files being written to the device. It also prevents the drive or card from being formatted.

Here are a couple of methods you can try to format the drive and remove the write protection. Bear in mind that there is no guarantee that they will work for you: your drive or memory card may be corrupt or broken and no utility or low-level formatting tool will make it work again. The only solution in this case is to buy a new drive.Occasionally, you’ll find that a USB flash drive will refuse to format and Windows will tell you that it is write protected, even though there is no switch.

Removing write-protection in the Registry using Regedit.exe

In any version of Windows from XP onwards, run Regedit.exe (searching regedit will usually show the program at the top of the list).
Navigate to the following key:
ComputerHKEY_LOCAL_MACHINESYSTEM
CurrentControlSetControlStorageDevicePolicies
Regedit StorageDevicePolicies
Double-click on the WriteProtect value in the right-hand pane of Regedit.exe. Change the Value data from 1 to 0 and click OK to save the change. Close Regedit and restart your computer. Connect your USB drive again, and you should find it is no longer write protected. You can now format the drive as normal by right-clicking on it in My Computer and choosing Format.
If you can’t find StorageDevicePolicies, you can try creating a key by right-clicking in the white space in the Control folder and choosing New -> Key and carefully entering the name.
Regedit new key
Now double-click on the new key (folder) and right-click once again and choose New -> DWORD. Name it WriteProtect and set its value to 0. Click OK, exit Regedit and reboot your computer.
If this method doesn’t work, try the following:

Removing write-protection using Diskpart

With your USB drive plugged in, launch a command prompt. Do this by searching for cmd.exe in the Start menu (or Start screen in Windows 8). In Windows XP, click Start then Run, and type cmd.exe in the box.
NOTE: you may need to run Cmd.exe with administrator privileges if you see an “access is denied” message.
To do that, right-click on the shortcut and choose Run as administrator. In Windows 8, simply choose Command prompt (admin).
Now, type the following, pressing Enter after each command:
diskpart
list disk
select disk x (where x is the number of your USB flash drive – use the capacity to work out which one it is)
attributes disk clear readonly
clean
create partition primary
format fs=fat32  (you can swap fat32 for ntfs if you only need to use the drive with Windows computers)
exit
 Diskpart


Available link for download

Read more »

Friday, 23 September 2016

How to Bypass Factory Reset Protection on Nexus Devices

How to Bypass Factory Reset Protection on Nexus Devices


An Android security researcher has found a way to bypass the factory reset protection (FRP) in the latest Android 6.0.1 Marshmallow build complete with the latest May Android Security Update.


Google introduced a new security measure in Android Lollipop called Factory Reset Protection (FRP). If you are already familiar with the term factory reset, you may have figured out what FRP is. Factory Reset protection keeps your data safe in case your device gets stolen. It does so by requiring authentication after a factory reset to make the device usable.

The method detailed by RootJunky apparently manages to bypass the factory reset protection system on the Huawei-made Nexus 6P. The researcher has detailed the bypass, meant specifically for Nexus devices

Bypass Factory Reset Protection on Nexus Devices

  1. Turn off your phone, enter into recovery menu, and factory reset your device.
  2. Now you’ll see the setup wizard. Tap on any Wi-Fi connection to get the “enter password” field. But instead of entering the password hold down “,” button and go into settings.
  3. Tap on language and then tap on the three vertical dots on the top right of the screen and then tap on “Help & feedback”.
  4. Now you’ll get a search bar. Type anything there and hold the text and then select “Share” from the popup menu.
  5. Choose the option to share it via Google messenger. Once the app opens, tap on “New message”.
  6. Dial any number in the “To” input field and then tap on “Send to”.
  7. You’ll see a contact’s like icon on the top right of the next screen. Tap on it and then tap on the “tick mark” icon. This will bring up phone icon that will let you make a call.
  8. Once the call is placed hit the pause button and then hit add dialler button. This will bring up the dialler.
  9. In the input field, type *#*#4636#*#*. Doing so will open up the test mode.
  10. Tap on “Usage statistics” and then tap on the back option. Now you’ll be in device’s settings menu.
  11. From the settings, you can factory reset your phone.
Now, the requirement for FRP to appear is that a Google account must be attached and your phone must have security option enabled. Since neither of these requirements is fulfilled while factory resetting the device for the second time, FRP will be bypassed.


Now follow the setup wizard, enter details of a new Google account, and you are good to go.


Available link for download

Read more »

Monday, 5 September 2016

Bypass Factory Reset Protection FRP on Coolpad Note 3

Bypass Factory Reset Protection FRP on Coolpad Note 3


In this post, I will show you how to bypass FRP on your Coolpad Note 3.The reason why we were always hesitant to provide a step-by-step guide on how to bypass the Factory Reset Protection (FRP) is because we wanted to help owners who lost their phones in our own way. However, we did receive a lot of emails from our readers asking for help as they unknowingly reset their phone with password and screen lock protection on.


The Factory Reset Protection (FRP) feature was introduced on Android with the release of Android 5.1 Lollipop, which is basically meant to protect your device and prevent unauthorized usage in case it’s lost or stolen.

What is Factory Reset Protection (FRP)?

Factory Reset Protection (FRP) is a protection and safety feature to prevent thieves from using a stolen or lost device even if they try to hard reset the phone to factory settings or even flash it. FRP works only when you’re signed into your Google account and then if someone tries to hard reset your phone through recovery mode, they are required to enter the information for any Google account that has been earlier added to the device in order to regain access.

Coolpad Note 3 user, if somehow you’ve forgot your Google account email or password and hence are stuck at Google account verification because of FRP then we’ve got you covered. I’ve figured out a simple workaround to bypass the factory reset protection on Coolpad Note 3 running Lolli

This bypassing FRP trick is indeed useful but worrisome at the same time as it could potentially allow a thief to gain unauthorized access to your smartphone by following the stated steps. Considering how easily I was able to open to the locked device itself shows how poorly this function is implemented by the device manufacturer.

via:webtrickz


Available link for download

Read more »