Showing posts with label root. Show all posts
Showing posts with label root. Show all posts
Thursday, 29 December 2016
Help with Yemen OF1 N900V root
Help with Yemen OF1 N900V root
I followed the instructions found here: http://ift.tt/1SSuYlZ
I downloaded ArabicTools and set my phone to USB Debugging and plugged it into my computer running Windows 7. Once the computer found the phone I clicked on Read Phone Info and it got all the info the application needed. I then clicked Root and waited. It says Device Now Flashing, Please Wait and then nothing happens except more periods being added..............My phone never restarts or anything, it just sits there like nothing is happening. When I plug my phone in it says connected as Installer, and shortly after it says connected as media device, not sure if that matters, but I figured I would give as much info as possible to try and figure out the problem.
I have tried 3 different cords after reading thru comments that maybe the cord could be the issue. Any ideas?
from xda-developers http://ift.tt/2a8OgYf
via IFTTT
Available link for download
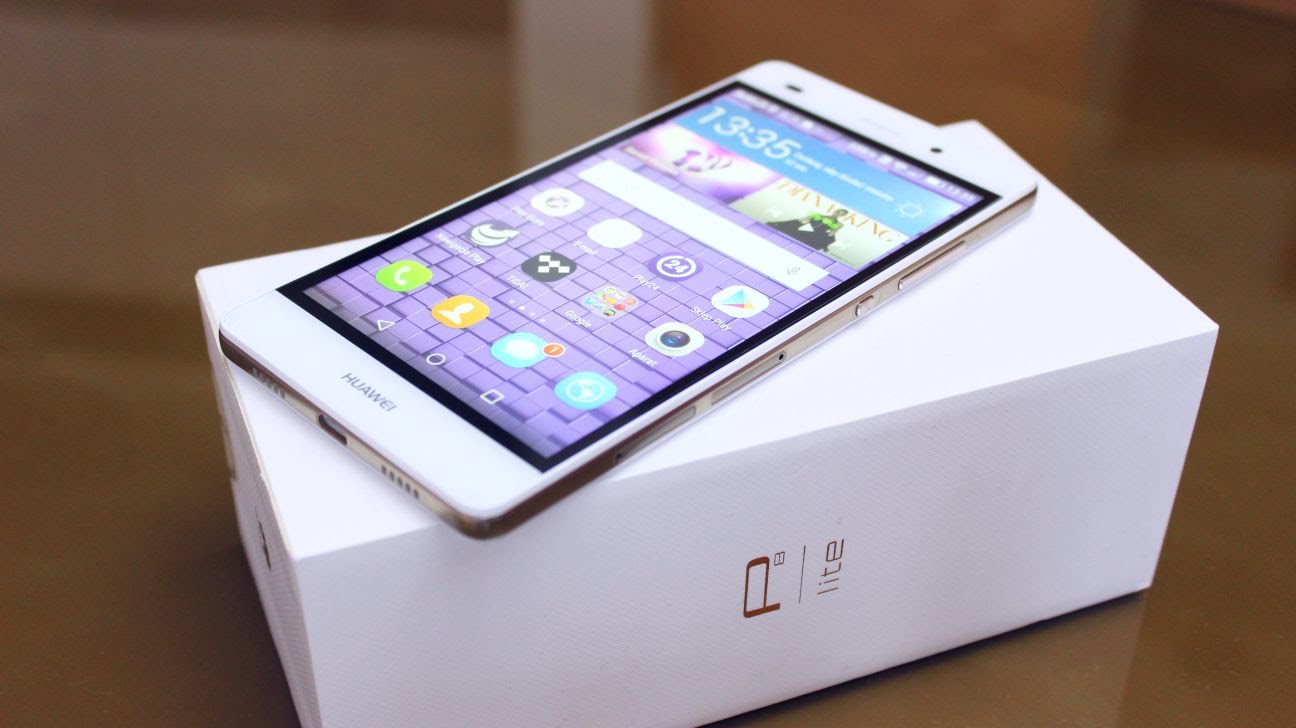
How To Root Huawei P8 lite Android Marshmallow 6 0 Update With SuperSu
How To Root Huawei P8 lite Android Marshmallow 6 0 Update With SuperSu
If you own a Huawei P8Lite running latest android 6.0 Marshmallow and you want to get root access on your device. Now you can easily Root Huawei P8 Lite With SuperSu v2.65 or above. But remember make sure your device’s bootloader is unlocked and you have a custom recovery (TWRP) Installed on your device. Then you can easily flash the latest SuperSu root file via recovery to get root access on your Huawei P8Lite
Now it is very simple and easy to root any Android 6.0 Marshmallow devices. Thanks to Chainfire’s auto boot patcher in SuperSu v2.65 and above, it’s very simple and easy to get root on most Marshmallow firmware from most manufacturers.
You can root almost all android 6.0 marshmallow devices (Stock Firmware) by just flashing the SuperSu v2.65 File.By Flashing This, you can easily Root Huawei P8 lite Android Marshmallow 6.0 Update
Warning: we will not be held responsible for any kind of damage occurred to your Huawei P8Lite while following this tutorial.Do it at your own risk.
Pre-Requirements:
- Huawei Mate P8Lite
- The bootloader must be unlocked.Guide > How To Unlock Bootloader On Huawei Devices
- Make sure you have TWRP Installed on your device
Downloads
- SuperSu v2.67 (download the V 2.67)
How To Root Huawei P8 lite Android Marshmallow 6.0 Update With SuperSu
STEP2- Boot your device into TWRP recovery.
STEP3- Tap on “Install” and select the SuperSU zip file that you transferred to your device in Step 1.
STEP4- After selecting the .zip file, do “Swipe to Confirm Flash” on the bottom of screen to begin the flashing process.
STEP5- Once SuperSU is flashed, you’ll get “Reboot System” option, select it.
Congratulations! Your device should be rooted now. Look for the SuperSU app in app drawer.
Available link for download
Saturday, 24 December 2016
How To Root Micromax A120 Canvas 2 Colors
How To Root Micromax A120 Canvas 2 Colors
If you are using Micromax A120 Canvas 2 Colors smartphone and looking for a way to root it, you are in the right place as I have given a step by step tutorial to root Micromax A120 Canvas 2 Colors here.

By following the rooting tutorial given here, you will be able to root your Micromax smartphone and get the ability to install custom ROM firmware’s, custom-built Android applications, custom-made recoveries (TWRP or CWM recovery), etc.
By following the rooting tutorial given here, you will be able to root your Micromax smartphone and get the ability to install custom ROM firmware’s, custom-built Android applications, custom-made recoveries (TWRP or CWM recovery), etc.
Rooting Guide for Micromax Canvas 2 Colours
- To get started, download Framaroot app to your device. Once downloaded, tap on the .apk file to install the application in your smartphone.
- Next, open the Framaroot app in your device.
- Now, select “Install SuperSU” as the action to execute after root. Once done, click on “Boromir” exploit to launch the rooting procedure.
- Once the rooting process is finished, you will get the following message: Success! Superuser and SU binary installed. You will have to reboot your device. Click “Ok” and reboot your device to finish the rooting process.
Available link for download
Thursday, 22 December 2016
Please help me safely root my lg g4
Please help me safely root my lg g4
I am trying to root my lg g4, I began the steps of unlocking the bootloader, downloaded the adb.exe etc, however when I type adb reboot bootloader into the command prompt whilst attempting to fetch my device id, it says device not found.. id be really greatful if somebody could walk me through this process. (thanks in advance)
from xda-developers http://ift.tt/2a4jZIV
via IFTTT
Available link for download
Saturday, 17 December 2016
How to Root Lenovo K4 Note
How to Root Lenovo K4 Note
If you are one of them who own Lenovo K4 Note and want to do some experiment by rooting your phone, then you need to know the proper way to root Lenovo K4 Note. In this post I am going to tell you step by step way to Root Lenovo K4 Note.

Some benefits of Rooting –
- You can install custom ROM and custom kernel on your device for faster and better performance.
- Block Ads in apps with the help of ad blocker.
- Increase performance and battery life by killing background process automatically.
- You can use Titanium Backup to restore all of your apps and data.
- You can uninstall bloatware (Pre-installed Apps)
Note:-
- Rooting may void your phone warranty, and you won’t claim it back.
- Although you won’t lose any data but you should still take Backup of your device for safer side.
- We won’t take any responsibility if anything happens to your phone.
How to Root Lenovo K4 Note
- First you should turn on ‘Unknown Source’ from Menu > Settings >Security.
- Download Kingroot app and install it on your device.

- After installing the app, Open it. It will check your device status, if the root is available for you or not.
- Now click on ‘TRY TO ROOT’ to start the rooting procedure. It will check for working exploit to root Lenovo K4 Note and take only minutes or two to complete the process.

- Reboot your device, when the process Completes. That’s it you successfully root Lenovo K4 Note with Kingroot.
- Download Root Checker app to confirm your phone is rooted or not.

How to un-Root Lenovo K4 Note
- You can easily unroot Lenovo K4 Note anytime with a single click
- To unroot, Goto Kingroot setting and click on ‘Uninstall Kingroot’.

- A popup appears, click on ‘Continue’ to un-root Lenovo K4 Note. After clicking on ‘continue’, the app will uninstall from your phone, and you will no longer be a root user.
Available link for download
HOW TO ROOT NOKIA X X XL INSTALL PLAYSTORE
HOW TO ROOT NOKIA X X XL INSTALL PLAYSTORE
Note:
This tutorial is strictly for Nokia X, X+ and XL.
No data is lost after this process.
You will need to to have at least 10% of battery on your device before you try this process.
Download an install Nokia X manager from here.
Download Gapps from here
Launch Nokia X manager and install Nokia drivers by clicking install ADB drivers button.
Wait for the drivers to install.
Enable Debug mode on the device by going to Settings > Developers option > USB Debugging (tick).
Connect the phone to the PC. Wait for Nokia X manager to detect the phone.
Now click Root Device.
Wait for your Device to boot into TWRP recovery.


Now on your device ( TWRP Menu ),
Click Mount > Tick System > Then click back.
Click Install > Navigate to phone storage > Select Update-SuperSU-v1.99r3.zip
Swipe the blue arrow icon to confirm.
Reboot phone.

If you will like to install Gapps (play store, gmail, g+ etc),
launch Nokia X manager, connect device and click install Gapps.
Select gapps-jb-20121011-signed.zip from directory and press open.
Wait for phone to boot into TWRP recovery.
Click install > Navigate to SD Card > select NokiaX_GApps_package.zip.
Wait for the process to complete.
Reboot phone.


Congratulations you have just Rooted your device and installed Gapps.
Thanks to Stanley ( Ang Stanley) for this wonderful app.
Available link for download
Sunday, 11 December 2016
Root HTC One M9 on Android 6 0 1 Marshmallow Update
Root HTC One M9 on Android 6 0 1 Marshmallow Update
HTC One M9 has been updated to the latest the Android 6.0.1 Marshmallow update. The Android 6.0.1 Marshmallow update may have reached most of the One M9 users. If you too have received the update, you may be looking at options to root the phone.

Popular Android developer Chainfire has updated SuperSU with all the changes required to work on Marshmallow devices.The latest version of SuperSU is v2.65 in the stable branch while the beta version is up to v2.71.
Once TWRP recovery has been installed and your phone has booted back into Android, it’s time to start the rooting process.
Download SuperSU 2.71 from the link above and transfer it to your phone.
Apart from that, you can also use RootChecker app to confirm if your One M9 has been rooted successfully.
Popular Android developer Chainfire has updated SuperSU with all the changes required to work on Marshmallow devices.The latest version of SuperSU is v2.65 in the stable branch while the beta version is up to v2.71.
Prerequisites
- SuperSU 2.71 (recommended) – Download here (or) SuperSU 2.65 – Download here
- TWRP 3.0.1-0 – Download here (You must installed TWRP recovery)
- ADB/Fastboot Installer – Download here
Root HTC One M9 Android 6.0.1 Marshmallow Update
Once TWRP recovery has been installed and your phone has booted back into Android, it’s time to start the rooting process.
Download SuperSU 2.71 from the link above and transfer it to your phone.
- Turn your One M9 off.
- Press and hold the Power and Volume Down buttons to boot into the bootloader.
- Now, use the volume rocker to highlight Recovery option. Press the Power button to confirm. This will boot your phone in TWRP recovery.
- In TWRP, click on Install and locate and select the SuperSU 2.71 zip file.
- Swipe to start flashing SuperSU 2.71.
Apart from that, you can also use RootChecker app to confirm if your One M9 has been rooted successfully.
Available link for download
Wednesday, 7 December 2016
Cannot root Nokia XL
Cannot root Nokia XL
I hav some issues with the usb connection so cant connect my phone to pc plz help me rooting it any other way
from xda-developers http://ift.tt/2adEoxA
via IFTTT
Available link for download
BEST APPS TO ROOT ANDROID SMART PHONES
BEST APPS TO ROOT ANDROID SMART PHONES

Note
When you root your device the warranty is void.
No data is lost after using any of this method
Framaroot
Framaroot is a powerful one click app to root android smart phones without PC. This app has many exploits to root different types of phones (Gandalf, Boromir, Pippin, Legolas, Sam, Frodo, Aragorn and Gimli). It installs Superuser & SU binary on the phone or tablet.
To use this;- Download Framaroot here
- Install & run the app on your smart phone or tablet.
- Select any of the exploits that shows ( Boromir, Pippin, Legolas, etc) depending on your device.
- You will see a Success message.
- Reboot Device

If you want to see a complete list of device that uses framaroot click here
framaroot is developed by
iROOT

iROOT formally known as vRoot is another powerful application to root most Android Smart phones.
To use this application follow the procedure below
- Download iROOT from here or here
- Install and launch it on your PC
- Set your Phone or Tablet to USB debugging mode by going to Settings > Developer Options > Debugging > USB debugging
- Connect your device to the PC
- iROOT will detect your phone, Click the ROOT button.
- Your device will reboot during the process.
- You will see a success message
- To check if your phone is rooted, open application menu and check if you have SuperUser or KingUser installed
- If you dont like the Chinese Super User, you can download an install Supersu from here
- reboot the device & enjoy.
This app is really great. It roots many devices not just Chinese MTK devices. Most Samsung Galaxy Devices can be rootedvusing this method.
iRoot is developed by Shenzhen
Root Genius

Root Genius is another application to root most Android Smart phones using PC.
To use this aplication follow the procedure below
- Download Root Genius from here or here
- Install and launch it on your PC
- Set your Phone or Tablet to USB debugging mode by going to Settings > Developer Options > Debugging > USB debugging
- Connect your device to the PC
- Root Genius will detect your phone, Click the Root It button
- Root Genius will root your phone and install kingUser app
- To check if your phone is rooted open apllication menu and check if you have KingUser installed.
- If you want to unroot, open KingUser - Settings - Remove Root Permission.
Root Genius is Developed by SJRoot
You can also verify if your device is rooted by using Root Checker
Other methods of rooting android smart phones will be dropped soon..
You can always make a request ;)
Available link for download
Monday, 5 December 2016
how to root ROW S327
how to root ROW S327
Hello and thank you all for your time. Can please someone help me choose the right method to root the latest ROW S327 so I can flash a custom rom? I can see so many methods and i dont know what to choose.... I dont want to brick my phone.... Please help!!
from xda-developers http://ift.tt/2a7RXu5
via IFTTT
Available link for download
Thursday, 1 December 2016
Root Guide eUI 5 6 5 8
Root Guide eUI 5 6 5 8
Root your phone at your OWN RISK
Instructions:
- Install MTK_X20Drivers
- Enable Developer mode
- Enable USB debugging in developer mode.
- Enable OEM unlocking
1. Download the FlashTool for yours version of eUI - 5.6 or 5.8
2. Enter Fastboot mode, reboot the phone whilst pressing Power On + Volume Down
3. Open adb_cmd.exe
4. Write fastboot oem unlock - (expects to complete the command)
5. Write fastboot flash recovery Letv-X620-Twrp-3.0.2-0.img - (expects to complete the command)
Now you should have TWRP installed !
Hold Power Button and Volume Up button to reboot into TWRP. Change in English language with right button.
- Flash no-verity-opt-encrypt.zip. If you do not do this you will not be able to boot your phone!
- Flash SuperSu .
Thats all !!!
from xda-developers http://ift.tt/2a8NBGn
via IFTTT
Available link for download
Wednesday, 23 November 2016
root Xperia Arc S enable reverse tethering wifi hotspot that uses it in 10 minutes
root Xperia Arc S enable reverse tethering wifi hotspot that uses it in 10 minutes
How to root Sony Ericsson Xperia Arc S and enable reverse tethering + wifi hotspot that uses the reverse tethering in 10 minutes:
I just learned how to do it
took me about 5 hours to learn and succeed, thought I might share it in case someone else might want to try in the future:
guide is only for windows machine, but you can use the sources to do the same with Linux or a Mac
It only requires a few tweaks to drivers installation and terminal code.
Also it might work with other Xperia devices but I cant promise it will, you might want to check sources for in depth look.
Sources:
https://www.youtube.com/watch?v=OxF4O5E2RiY&index=10 - how to root Xperia Arc S video
http://ift.tt/2al0w7t how to root Xperia Arc S
http://ift.tt/1zPFdOC - how to enable reverse tethering
http://ift.tt/2al0Q5W - how to get your wifi hotspot to share reverse tethering
http://ift.tt/1bsn4uJ - drivers in case you need them
1) root your device:
in phone:
settings -> applications -> enable "unknown sources"
settings -> applications -> development -> enable USB debugging"
settings -> Sony Ericsson -> connectivity -> USB connection mode -> set to "mass storage mode (MSC) -> OK
Connect your device to windows
Windows should automatically install the required drivers
If in some case it does not, or if you have problems rooting your device
Just install the drivers from this link:
http://ift.tt/1bsn4uJ
If the link is broken in the future I uploaded it to tinyupload:
http://ift.tt/2al1aBP
Just install the driver that you need
Xperia Arc S actually is actually not listed there, I just installed all the ones that have "s" and "arc" in them
It takes a bit of space so try to not just install all of them
Download the rooting software from
http://ift.tt/2al0OLG
Once it downloads activate it
A green windows written in Japanese should pop up
You dont need to understand a bit of what it says
If you see a big green button that says "ROOT" then all is good
If you dont it means some of the steps above were not done correctly
Either you didnt change your phone settings or you dont have the necessary drivers
Press the big green button that says "ROOT"
it should show you a list of 4 things
The 3 first things will change to a V sigh rather quickly
The 4th thing should take a little bit more
Once its finished you should see a different big green button that says "*SomethingInJapnese*ROOT"
DO NOT PRESS IT
Just exit the program
If you pressed it you need to close the program from the task manager (ctrl+shift+esc in windows 10, ctrl+alt+delete in older windows)
now you phone is rooted :)
2)enable connection sharing in your computer
Go to Control PanelNetwork and InternetNetwork Connections
If for some reason it doesnt find the path
Press Start+R, write "ncpa.cpl" (without the quotation marks) and press enter
This is taken from the "how to enable reverse tethering" guide I linked in above, it explains it nicely:
right click on an Internet connection that you have.
I assume that you are using a desktop which doesnt have any wifi adapter, so right click on LAN Ethernet connection with Internet, and select "Properties".
in tab "Sharing" (or "Advanced" for Windows XP), click "Allow other network users to connect through...", then select the USB connection in dropdown list below.
click OK. Windows will automatically setup your USB network connection and assign to it an IP address, default for Windows 7: 192.168.137.1, default for Windows XP: 192.168.0.1.
You can see your Internet connection is now "Shared" and your USB connection is now "Unidentified network".
In case you dont see a dropdown list (like me)
press settings (in the "Sharing" tab) and it will be there
I actually didnt see "USB connection" as an option so I just marked "FTP Server" and "HTTP Server" and it worked for me
Once you press OK it should take some time for your machines to set things up so dont panic if it loads for a minute or so
3)install terminal emulator on your phone
You have 2 options here
1) register your phone with a fake gmail account, download the playstore app (from the market app) and download what you need
it didnt work for me, for some reason even after I registered it said that my account is not connected even though it certainly was
If you want to risk it you may try but for me it was just a waste of time
2) download the apk for the app and install it using the phone built in package installer.
Using your phone browser, go to
http://ift.tt/1CguVrz
IF IT POPS UP A REQUEST TO CONTINUE OR CANCEL ALWAYS PRESS CANCEL
it just tries to redirect you to an advertising site, it wont affect your download if you press cancel
copy and paste the link from the Google play store site of the app you want to install
In this case the link is:
http://ift.tt/1llHVUa
press "Generate Download Link", I should load a bit and then open a new green button that says "Click here to Download"
(if you dont see it scroll down)
press it and it should start the download.
You can open the file directly by opening the notification bar and pressing on the file that was just download
(notification bar like a drop down curtain, just slide your finger from the top of the screen downwards)
select "Package installer" as the app to open it with and it should install it quickly.
Also for later if you dont have one already installed, install some kind of note app
I just installed this one:
http://ift.tt/2ajnxuz
4)
connect your device to your computer
In your phone go to
settings -> wireless&networks -> Tethering & portable hotspot -> enable USB tethering
Wait for it to connect, once it does you can move on
Go to your terminal emulator, write "su" (without the quotation marks) and press enter
What it does is asks the phone to give you "Super User" permissions to change your phone built in settings
Give the app permission to do so.
The sign in the terminal emulator should change from $ to # to indicate that you have Super User permissions
Next, copy those lines to the terminal emulator and press enter
(you might want to save them in your note app before, Ill explain why in a bit)
netcfg usb0 dhcp
ifconfig usb0 192.168.137.2 netmask 255.255.255.0
route add default gw 192.168.137.1 dev usb0
echo 1 > /proc/sys/net/ipv4/ip_forward
iptables -t nat -F
iptables -t nat -A POSTROUTING -o usb0 -j MASQUERADE
iptables -P FORWARD ACCEPT
first 3 lines - for reverse tethering
Next 4 lines - for wifi hotspot reverse tethering sharing
couple of notes:
1)if it prints something like "iptables failed strangely: No such file or directory"
just ignore it, it works anyway
2)if you get an error relating to "dhcp" - make sure you enabled "USB tethering" in your device, and that you enabled connection sharing in your computer.
3) if for some reason you have other errors, try replacing "usb0" with "rndis0" in lines 1,2 and 3
not sure if you also need to change the "usb0" in line 6, but if it still gives you an error I didnt describe try chaging that too.
if you did get any errors just copy and paste the code (with the needed changes if any are needed) to the terminal emulator again
remember to do so only in su mode! (# instead of $)
also, save the final version (the version that worked for you) of the code lines in the note app you installed (step 5 explains why)
everything should now work perfectly
reverse tethering should work
and if you want to enable wifi hot spot just go to
settings -> wireless&networks -> Tethering & portable hotspot -> enable Portable WI-Fi hotspot
5)
for me the reverse tethering and wifi hotspot sharing stops working after I reboot the phone
In such a case just
1)connect your phone to your computer
2)in phone: settings -> wireless&networks -> Tethering & portable hotspot -> enable USB tethering
3)go to terminal emulator
4)go to Super User mode (write su and press enter)
3)copy and paste the code you saved from the note app to the terminal emulator and press enter
and it should work again
if you want to connect your phone to another computer, to the exact same steps but remember to enable connection sharing in your computer before!
hope this little guide helped you :)
-dmagen
from xda-developers http://ift.tt/2al17Gh
via IFTTT
Available link for download
Tuesday, 22 November 2016
M8s mini II root link baidu please help download
M8s mini II root link baidu please help download
Hi,
I contacted gearbest to root my TV box and they sent me a link from Baidu. I tried to download it but I cant because it want a Chinese number to register. Somebody can download and upload on mega or something else the Rom? Thanks
Link: http://ift.tt/2ajn2AB Password: nd93
I contacted gearbest to root my TV box and they sent me a link from Baidu. I tried to download it but I cant because it want a Chinese number to register. Somebody can download and upload on mega or something else the Rom? Thanks
Link: http://ift.tt/2ajn2AB Password: nd93
from xda-developers http://ift.tt/2al0NqL
via IFTTT
Available link for download
Tuesday, 15 November 2016
Sunday, 13 November 2016


Saturday, 12 November 2016
Guía para mover aplicaciones al SD usando Link2SD ROOT
Guía para mover aplicaciones al SD usando Link2SD ROOT

En vista que hay muchos equipos Android con una limitada memoria interna. A partir de Android 2.2 se incluyó una opción nativa para mover aplicaciones a la SD Card. El problema es que no todas las aplicaciones son compatibles con esta opción, por lo que equipos con escasa memoria, se ven fuertemente limitados en la posibilidad de instalar nuevas aplicaciones, e inclusive, tienen tan poco espacio,que no pueden ni siquiera actualizar las Apps del propio sistema operativo.
Esta Guía fue hecha usando un Motorola XT316 como ejemplo, porque tiene apenas unos miserables 164 Mb de memoria interna y creánme que se agotarán el mismo día que lo compren, prácticamente actualizando las apps que trae el propio teléfono e instalando Whatsapp y alguna otra app.
Sin embargo, es importante destacar que esta Guía puede ser usada en muchos otros equipos .Sería cuestión que la prueben . Solo les podría adelantar que no funciona en los Samsung Galaxy S3, Note1 ni Note2 de acuerdo a su desarrollador) http://www.link2sd.info/faq
Para mover las aplicaciones, básicamente se requieren 2 pasos:
1. Crear una partición en la tarjeta Micro SD ( usando el MiniTool Partition Wizard Home Edition).
2. Instalar Link2SD y mover las Apps (Requiere Root y Android igual o superior a 1.6)
A continuación explicaré de forma detallada los pasos:
Paso 1 : Crear una partición en la tarjeta Micro SD
1. IMPORTANTE: hagan un backup de todo el contenido de la Micro SD. Alguna cosa podía salir mal y es pereferible que tengan un backup por si acaso.
2. Instalan el MiniTool Partition Wizard Home Edition y lo ejecutan, introducen la tarjeta Micro SD en el PC ( usando el adaptador correspondiente). Observen que usé una Micro SD de 2 Gb y el sistema la muestra como Disk 2)

3. Hagan click en la el disco que corresponda a su Micro SD y luego Click derecho, les mostrará la opción de Move/Resize. Con ella vamos a cambiar el tamaño de la partición actual para hacerle espacio a la nueva partición. Teóricamente no se borran los datos de la tarjeta. En mi caso no se borraron.

4. En mi caso, dejé la partición original en 505 Mb, ya que no pienso grabar demasiados datos allí. Sin embargo es decisión de cada uno. Lo más importante es que la partición sea mas grande que el espacio actualmente usado en la micro SD.

5. Al presionar OK, podrán observar que les quedarán 2 particiones. La original que ahora mide 502 Mb y la nueva que mide 1.3 Gb.

6. El sistema le indicará que la nueva partición no podrá ser usada en Windows. Presione Yes.

7. Seleccionan las opciones de la segunda partición. IMPORTANTE: debe ser Primary. En File System pueden escoger entre ext2, ext3 or FAT32. Yo escogí Ext2, sin embargo el FAT32 es el mas compatible con la mayoría de los equipos.

8. Seleccionan Ok y luego Apply y seleccionan Yes :


9. Ya hicieron la partición. Ahora insertan la tarjeta en el equipo y continúen con el Paso 2 de Instalar y Mover Apps con Link2SD
Paso 2 :Instalar Link2SD y mover las Apps.
1. Instalan Link2SD
2. Seleccionan el tipo de sistema de archivo de la segunda partición (en mi caso ext2) y hacen click en Aceptar:

3. Le dan Aceptar y reinician el teléfono. Ya tienen instalado y configurado Link2SD.

4. Al reiniciar, entran en Link2SD y seleccionan alguna aplicación, como ejemplo Tune In Radio, pero puede ser cualquiera. Seleccionan Mover a la tarjeta SD :


5. Pueden ir moviendo la mayor parte de las aplicaciones de usuario a la SD
- Es importante destacar que pueden regresar las apps a la memoria interna si lo desean.
- Si ustedes desinstalan alguna de las aplicaciones movidas, Link2SD removerá automáticamente los archivos de la Micro SD
- Si ustedes actualizan alguna aplicación desde Google Play, primero se copiará en la memoria interna y luego Link2SD la moverá automágicamente a la SD
- Link2SD funciona desde Android 1.6 en adelante
- Link2SD también permite convertir aplicaciones del Sistema, en aplicaciones de Usuario y luego moverlas a la micro SD (tengan cuidado con esto).
Fuente: XDA
Available link for download
Sunday, 6 November 2016
Friday, 4 November 2016
How to Root and Install Custom Recovery on Honor 4X and Ascend G620S
How to Root and Install Custom Recovery on Honor 4X and Ascend G620S
Today i will guide on How to Root and Install TWRP Recovery on Honor 4x. To Install a recovery you need to follow this post very carefully. Read all the below steps properly. If you don’t understand leave a comment. We will quickly get back to you. So first we will guide you on How to Install Recovery TWRP on Honor 4x and then we will guide on to flash root.

Step 1: First enable USB debugging from setting>developer option>. To enable Developer Options, go to About phone and tap the Build Number 7 times.
Step 5: Type this command correctly in command prompt without quotes “fastboot flash recovery recovery.img” and then press enter. It starts flashing recovery on your phone.
Step 6: Now type “fastboot boot recovery.img“ in command prompt it will reboot your phone into recovery mode.Now you successfully installed custom recovery on Honor 4X.
Step 7: You are in recovery mode now. In TWRP recovery navigate to Install Zip and select ‘SuperSu.zip’.
benefits of Rooting –
- You can install custom ROM and custom kernel on your device for faster and better performance.
- Block Ads in apps with the help of ad blocker.
- Increase performance and battery life by killing background process automatically.
- After root and install custom recovery on Honor 4/4X you can install Xposed Framework to customize your device
- You can use Titanium Backup to restore all of your apps and data.
- You can uninstall bloatware (Pre-installed Apps)
Note:-
- Rooting may void your phone warranty, and you won’t claim it back.
- Follow the steps correctly otherwise you may brick your device. We are not responsible for any damage of your phone.
- It will erase all your personal data including data of internal storage, so we advise you first to take a complete backup of your phone and then proceed.
- Ensure that your phone has at least 50-60% charged to prevent the accidental shutdown in-between the process.
Files required: –
- Download and install Universal ADB driver for Honor 4/4X if above doesn’t work.
- Download TWRP Recovery for Honor 4x and 4 play and place it in the folder where ADB installed and rename it to ‘recovery.img’.
- Download SuperSu to root Honor 4/4x and copy it to your phone sd card.
How to Root and Install Custom Recovery on Honor 4X and Ascend G620S
Step 1: First enable USB debugging from setting>developer option>. To enable Developer Options, go to About phone and tap the Build Number 7 times.
Step 2: Now go to installation directory open ADB folder and open the command window thereby pressing and hold the ‘shift’ key and right-clicked anywhere in that folder.
Step 3: Now connect your phone to PC and reboot the device into fastboot mode by typing “adb reboot bootloader”.
Step 4: In command prompt type “fastboot devices” and hit enter, it gives you serial numbers in return means your phone connect properly otherwise check the device driver again.
Step 5: Type this command correctly in command prompt without quotes “fastboot flash recovery recovery.img” and then press enter. It starts flashing recovery on your phone.
Step 6: Now type “fastboot boot recovery.img“ in command prompt it will reboot your phone into recovery mode.Now you successfully installed custom recovery on Honor 4X.
Step 7: You are in recovery mode now. In TWRP recovery navigate to Install Zip and select ‘SuperSu.zip’.
Step 8: Swipe to install SuperSu and reboot your device. That’s it, you root and install custom recovery on Honor 4X or 4 play or Ascend G620S successfully.
So this is the complete guide of how to root and install custom recovery on Honor 4X with easy steps. To verify root access, just download root checker from Google Play store and confirm if your device has gained root access. If you have any questions, comment below.
Available link for download
Wednesday, 2 November 2016
HOW TO ROOT NOKIA X2 AND INSTALL GOOGLE PLAY STORE
HOW TO ROOT NOKIA X2 AND INSTALL GOOGLE PLAY STORE
I will show two different ways of Rooting the Nokia X2 android device
The first method is using Towel Root.
Download the app from here
install it on the device
Make sure your network data service is on.
Run it then tap on "make it rain" to root
Download & install supersu from here
Run it then tap Normal.
Reboot your device
The second method is using Nokia X2 tools created by Allnokia.ru
Download Nokia X2 Tools from here
Enable USB debugging mode by going to Settings > About Phone > tap five times on software version > (tick) Enable USB Debugging.
Launch Nokia X2 tools on your PC

You will see above screen after launching Nokia X2 tools.
Plug your the Nokia X2 to the PC with a USB cable
Press 1 to install Drivers for Nokia X2.
Press 4 to root Nokia X2.
Now your Nokia X2 is rooted.
Press 2 to install Google Play Store on the device.
Enjoy...........
Available link for download
Root Galaxy Core Prime VE SM G361F Android 5 1 1 Lollipop
Root Galaxy Core Prime VE SM G361F Android 5 1 1 Lollipop
Today we will explain How to Root on Galaxy Core Prime VE SM-G361F with Official Firmware 5.1.1 Lolli SM-G361F Root process is not much different from most Samsung Phone devices, so if you made that before you will do it easily, if not don’t worry we are here to help you.
As we said, this Root Guide for official firmware only not for Custom ROMs. If you didn’t get this official update 5.1.1 Lollipop yet on your SM-G361F, so follow this link if available or use the site search here to see if we released this update here. If you didn’t find this update tell us in the comments and we will provide you with the link.
In this Guide we will use Pre-Rooted, because it is the easiest, most secure, and the best one for Rooting SM-G361F. We will use this Root method with a Windows based tool Called Odin.
Before Rooting your Galaxy Core Prime VE SM-G361F please follow this notes:
- This Root process at your own risk and Galaxy Rom Website Team are not responsible for any damage caused on your phone as a result of doing it the wrong way.
- This Root is only for Galaxy Core Prime VE SM-G361F and it is not for any other model, so don’t use it in any other model because it may damage your Phone.
- You may need to make a backup for all of your important data to avoid data lose in case of any mistakes happened.
- Your Phone Battery must be 50% at least before starting the Rooting Process.
- Do not remove the cable from the phone while the Root is being installed.
- Attached images are only for explaining only and you may see small differences.
- You should be known that is the Rooting process will avoid your Phone Warranty and you will not be able to use your Warranty anymore and you will not be able to receiving OTA updates even if you removed the Root.
- Again, this Root is only for Galaxy Core Prime VE SM-G361F not any other model.
Files required for installing the Root Galaxy Core Prime VE SM-G361F
· Odin v3.10.7 of here
· Pre-Rooted File Here is the Root File or Here
How to Root in Galaxy Core Prime VE SM-G361F :
- Download CF-Auto-Root for Galaxy Core Prime VE SM-G361F and extract the Zip file, and select the Pre-Rooted-klte-kltedx-smg900f.tar.md5
- Download Odin v3.10.7 and extract the Zip file: Odin v3.10.7.Zip
- Now, Turn off your phone and Boot your Galaxy Core Prime VE SM-G361F into Download Mode
by pressing and holding the Volume Down + Home + Power buttons together
(long press until the boot screen appear), now press Volume Up key to proceed to Download Mode. - You will get this alert as Shown in the following, press Volume up to continue
- Make sure that the USB Debugging mode is enabled, if not go to Developer Options and Enable USB Debugging Mode.
- Run the Odin v3.10.7.exe or Odin3 v3.07.exe file as Administrator (Right click on the .exe file and Select Run as administrator)
- Now connect your Galaxy Core Prime VE SM-G361F to your Computer via USB cable.
- In Odin3 screen, you should see a COM Port number like “0:[COM7]” at
- ID:COM section and “Added!” text at the message box. This means your
- device has been detected by Odin3.
- Make sure that, only the “Auto Reboot” and “F. Reset Time” options are checked.
- Now, click on the PDA button and select the Pre-Rooted-klte-kltedx-smg900f.tar.md5 file.
- Finally, click on the Start button to begin the Rooting process, wait a few moments.
- Once completed, you would see “PASS!” message in ID:COM Section with a Green Background.
- Your phone should Reboot Automatically. You can now disconnect your phone from your Computer Safely.
Congrats! You have completed the Rooting Process and Now you get Root Access on your Galaxy Core Prime VE SM-G361F with Stock Firmware Android 5.1.1 Lolli
Available link for download
Subscribe to:
Posts (Atom)